
- . Upcycle
- Restoring the storage cube tutorial
20JUL | 2011

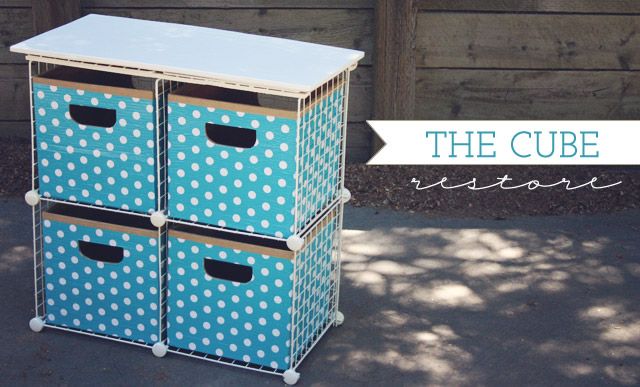
Last year I purchased this wire storage cubes to organize some of my craft boxes, and even tho they work, those particular ones are not like the old, resistant and super durable ones that Ken had. So when he decided to toss his, because there were some connectors missing, I decide to restore them at a very low cost, $5.50 to be exact. Now even tho I know that this tutorial might not apply to many people because restoring is a very unique process, I do think that since I made cardboard cubes to fit inside, those can be use with or without a structure to insert them. So here it goes =]
My plan was to make cardboard cubes to go inside and a top surface to cover the missing connectors. So here I will share with all of you how I made everything, maybe something in here can come handy to some of you =]
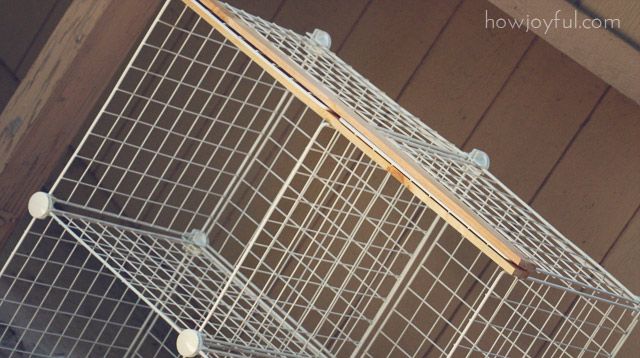
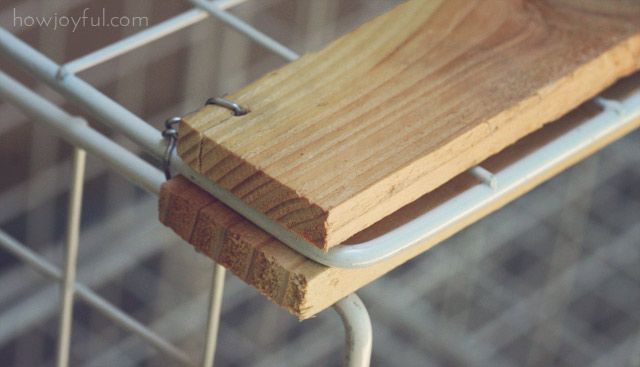
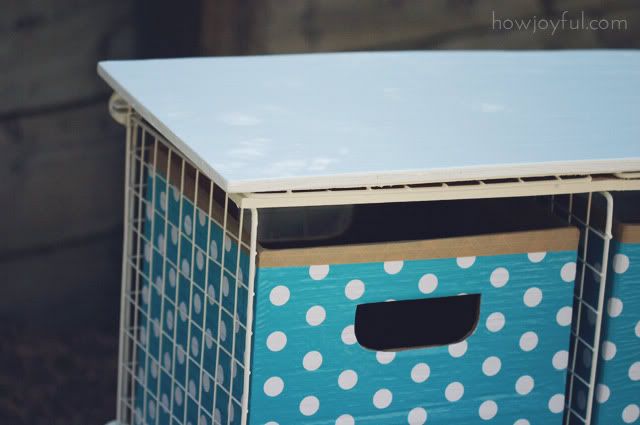
I started fixing the top of the cubes, where the missing connectors where, I added 2 little pieces of scrap wood, one on top and one under the top panels, I made wholes with a nail and hammer, then tied everything together with wire on the back side, so once I set the cover the wire will not be visible.
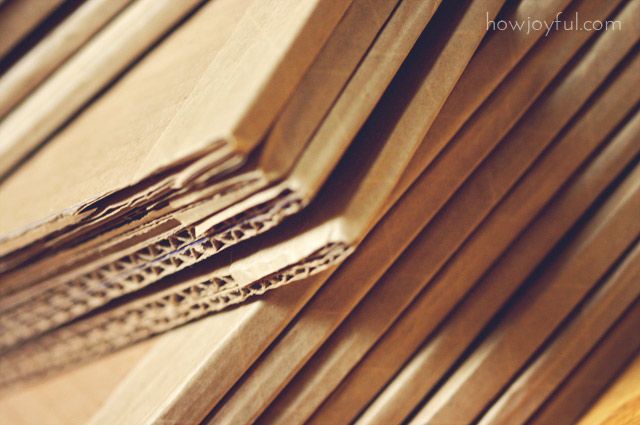
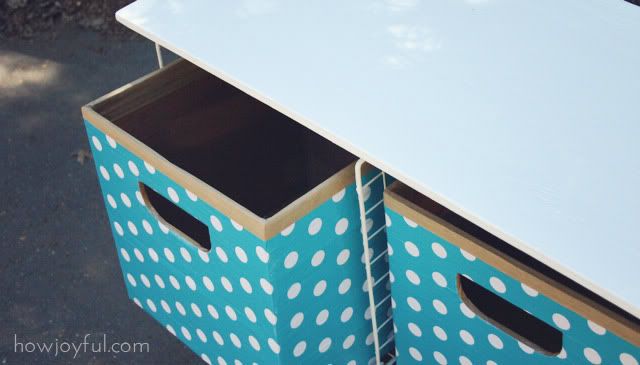
Then I cut all the pieces for the cardboard cubes. I wanted them to be sturdy so I used 2 layers for each piece. to glue them together I used paper packaging tape fiberglass reinforced from Staples. I like to use a kitchen sponge and a bowl of water instead of the tools they offer for it (to me it’s just the same)

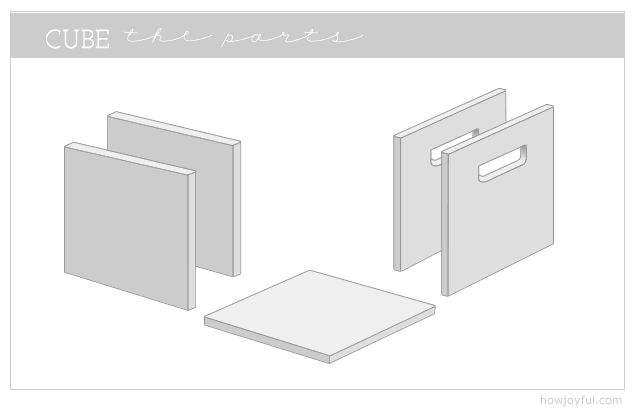
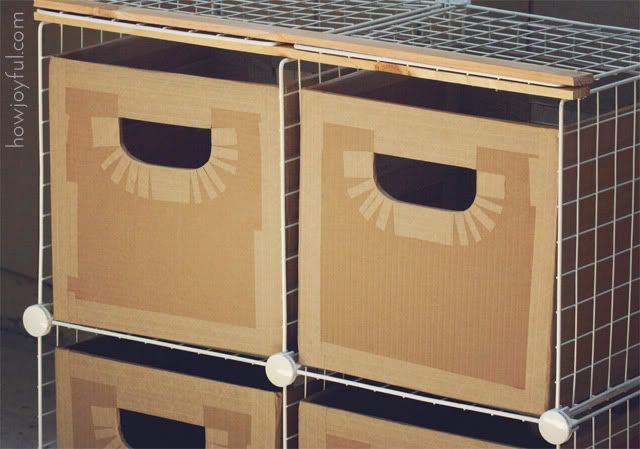
So basically for each cube you will need 5 parts, but since my cardboard was not thick enough for the sides and fronts I end up cutting double number of parts and taping them together, if you have double thick cardboard you will not need to cut double. it just makes it sturdier.
Now that you have your parts, if like me you only had single sheets of cardboard you can tape 2 sides together so they hold better, I taped the tops all the way and I put a little piece on the bottoms just to hold them together.
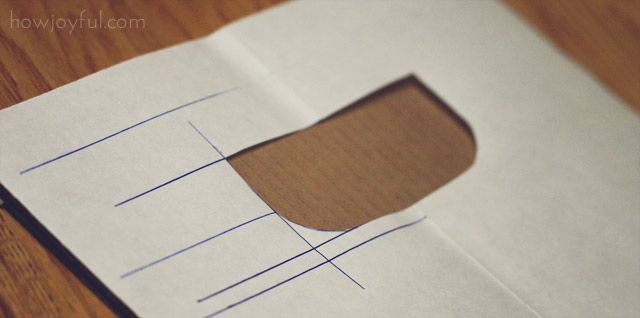
Now for the handles since I wanted all of them looking the same I made a template, with a sheet of paper I cut the total width of the front part folded in half and mark all my measurements, to make the curves on the bottom I used a glass.
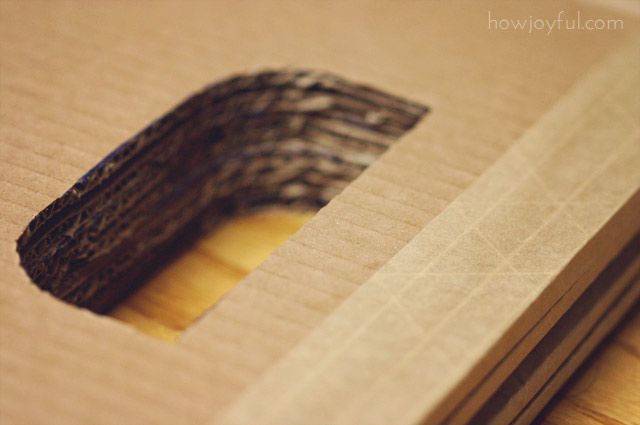
To cut the handles I used an x-acto knife and cut them one by one, I rather go through all the work than try to save a cut and pile 2 or more.because sometimes that ruins all of them, so just go one by one =]
For the inside of the handles, I cut a piece of tape of the exact size of the top and curves, marked the center with a pen and then marked the width, because I made cuts on both sides. And I only watered one side of the paper tape when applying so I could focus on that side and once I had one side perfect I moved to the other.

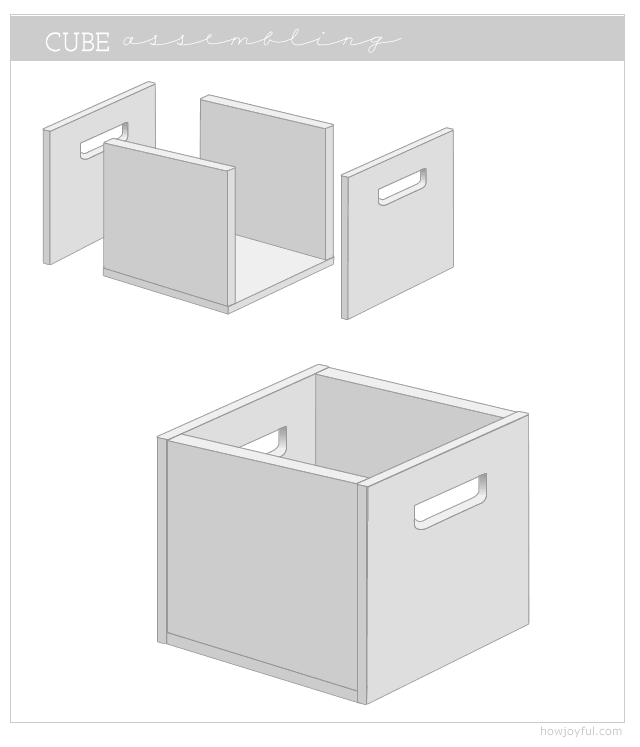
In this case I think the image speaks for it self, this is how I assemble them =]
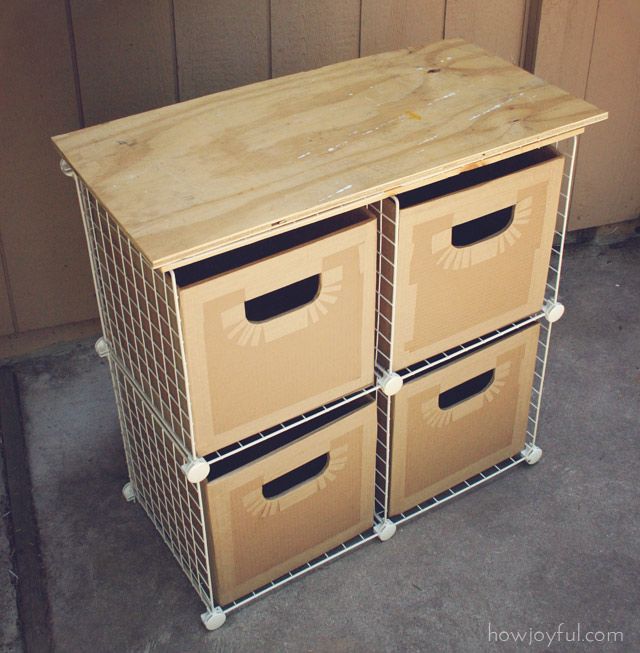
For the top of my cubes I cut an old piece of plywood I found in the garage, the exact measurement is 16x 32 inches. So after having my cubes and top surface ready it was time to paint and get prettify!
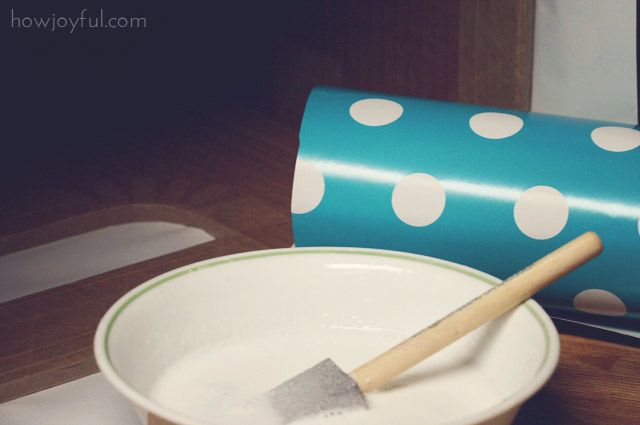
I used normal gift wrapping paper I had saved for the cubes, and even tho I was going to make two polka-dot and two plain turquoise I loved the way the polka-dots look, so I went with that for all of them. I dissolved 1 cup of tacky glue in half a cup of water, with a sponge brush applied to once surface at a time, I rolled the outside of the cube like this and then cut the excess of paper on the top (later on I added tape on the top to have a clean finish) as for the bottom, I just folded like a gift wrapping box and glue everything with tons of glue, because there is never too much glue, OK maybe there is, so don’t go crazy with it =]
I painted my piece of plywood with white primer and to secure it to the cubes I used some left over pieces of glue Velcro (it actually holds pretty good, but only prevents from moving around, if I force it it will come off)
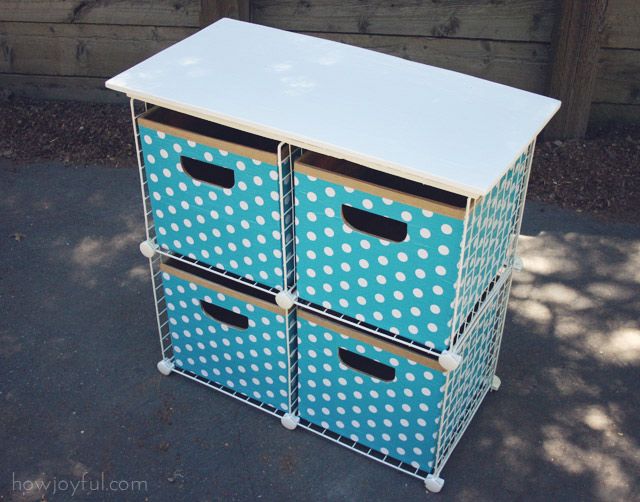
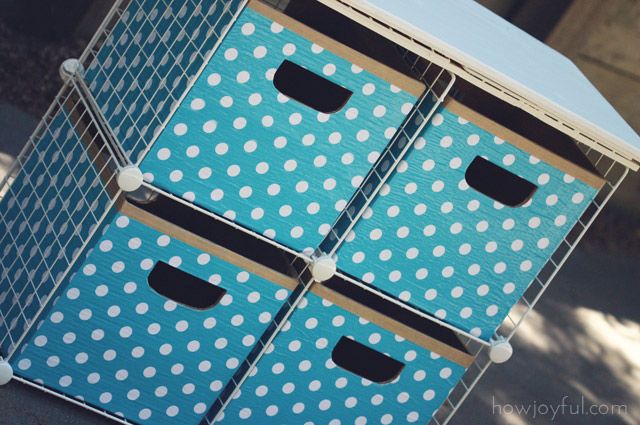
I used this to store all the old t-shits, curtains and materials I have for upcycle project. Because let’s be hones, all of those items are not cute until after you finish with them =] The boxes are the perfect size, sturdy and so far it has worked great =]
Since I already had the cardboard, plywood, Velcro and the paper packaging tape. The restoring only cost me $2.50 for the paint and $3.00 for the 2 rolls of gift wrapping paper, so for $5.50 as the grand total, I will call this a success. After all it’s not going to the the central piece in my sewing room, just my upcycle material organizer =]
I hope you all enjoy and get inspired to make some cubes! you can make them to fit any space you feel you can take advantage of with them, craft ON and have a wonderful day
navegando na net olha oq encontrei neste site
Nenhum comentário:
Postar um comentário